Monday 29 December 2008

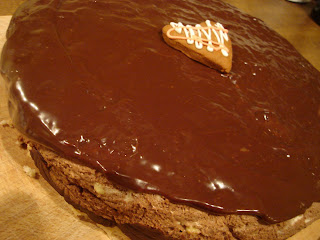
Daring French Yule Log


I almost didnt dare after first reading the December challange recipe. It was 10 pages long. This month's challenge is brought to us by the adventurous Hilda from Saffron and Blueberry and Marion from Il en Faut Peu Pour Etre Heureux. They have chosen a French Yule Log by Flore from Florilege Gourmand.
There I was from my head to toes with the chocolate and close to crying and wanting for it all to be over. The result was worht it. Everyone loved it. Defenately a festive choise.

Element #1 Dacquoise Biscuit (Almond Cake)

2.8 oz (3/4cup + 1Tbsp / 80g) almond meal
1.75 oz (1/2 cup / 50g) confectioner’s sugar
2Tbsp (15g) all-purpose flour
3.5oz (100g / ~100ml) about 3 medium egg whites
1.75 oz (4 Tbsp / 50g) granulated sugar

1. Finely mix the almond meal and the confectioner's sugar. (If you have a mixer, you can use it by pulsing the ingredients together for no longer than 30 seconds).
2. Sift the flour into the mix.
3. Beat the eggs whites, gradually adding the granulated sugar until stiff.
4. Pour the almond meal mixture into the egg whites and blend delicately with a spatula.
5. Grease a piece of parchment paper and line your baking pan with it.
6. Spread the batter on a piece of parchment paper to an area slightly larger than your desired shape (circle, long strip etc...) and to a height of 1/3 inches (8mm).
7. Bake at 350°F (180°C) for approximately 15 minutes (depends on your oven), until golden.
8. Let cool and cut to the desired shape.

Element #2 Dark Chocolate Mousse

2.5 sheets gelatin or 5g / 1 + 1/4 tsp powdered gelatin
1.5 oz (3 Tbsp / 40g) granulated sugar
1 ½ tsp (10g) glucose or thick corn syrup
0.5 oz (15g) water
50g egg yolks (about 3 medium)
6.2 oz (175g) dark chocolate, coarsely chopped
1.5 cups (350g) heavy cream (35% fat content)

1. Soften the gelatin in cold water. (If using powdered gelatin, follow the directions on the package.)
2. Make a Pate a Bombe: Beat the egg yolks until very light in colour (approximately 5 minutes until almost white).
2a. Cook the sugar, glucose syrup and water on medium heat for approximately 3 minutes (if you have a candy thermometer, the mixture should reach 244°F (118°C). If you do not have a candy thermometer, test the sugar temperature by dipping the tip of a knife into the syrup then into a bowl of ice water, if it forms a soft ball in the water then you have reached the correct temperature.
2b. Add the sugar syrup to the beaten yolks carefully by pouring it into the mixture in a thin stream while continuing to beat the yolks. You can do this by hand but it’s easier to do this with an electric mixer.
2c. Continue beating until cool (approximately 5 minutes). The batter should become thick and foamy.
3. In a double boiler or equivalent, heat 2 tablespoons (30g) of cream to boiling. Add the chopped chocolate and stir until melted and smooth.
4. Whip the remainder of the cream until stiff.
5. Pour the melted chocolate over the softened gelatin, mixing well. Let the gelatin and chocolate cool slightly and then stir in ½ cup (100g) of WHIPPED cream to temper. Add the Pate a Bombe.
6. Add in the rest of the WHIPPED cream (220g) mixing gently with a spatula.

Element #3 Cinammon-Milk Ganache Insert

1.75 oz (4 Tbsp / 50g) granulated sugar
4.5oz (2/3 cup – 1 Tbsp / 135g) heavy cream
A pinch of cinnamon
2.7 oz (75g) milk chocolate, finely chopped
3.2 oz (90g) dark chocolate, finely chopped
3Tbsp + 1/2tsp (45g) unsalted butter softened

1. Make a caramel: Using the dry method, melt the sugar by spreading it in an even layer in a small saucepan with high sides. Heat over medium-high heat, watching it carefully as the sugar begins to melt. Never stir the mixture. As the sugar starts to melt, swirl the pan occasionally to allow the sugar to melt evenly. Cook to dark amber color (for most of you that means darker than last month’s challenge).
2. Heat the cream with the cinnamon (use the quantity of cinnamon you want to infuse the cream, a pinch is the smallest amount suggested) until boiling. Pour cream into the caramel and stir thoroughly. Be very careful as it may splatter and boil.
3. Pour the hot caramel-milk mixture over the milk and dark chocolate. Wait 30 seconds and stir until smooth.
4. Add the softened butter and whip hard and fast (if you have a plunging mixer use it). The chocolate should be smooth and shiny.

Element #4 Chocolate Crisp Insert

3.5 oz (100g) milk chocolate
1 2/3 Tbsp (25g) unsalted butter
2 Tbsp (1 oz / 30g) praline
1 oz. (25g) lace crepes or rice krispies or corn flakes or Special K

1. Melt the chocolate and butter in a double boiler.
2. Add the praline and the coarsely crushed lace crepes. Mix quickly to thoroughly coat with the chocolate.
3. Spread between two sheets of wax paper to a size slightly larger than your desired shape. Refrigerate until hard.

Element #5 Vanilla Crème Brulée Insert

1/2 cup (115g) heavy cream (35% fat content)
½ cup (115g) whole milk
4 medium-sized (72g) egg yolks
0.75 oz (2 Tbsp / 25g) granulated sugar
1 vanilla bean

1. Heat the milk, cream, and scraped vanilla bean to just boiling. Remove from the stove and let the vanilla infuse for about 1 hour.
2. Whisk together the sugar and egg yolks (but do not beat until white).
3. Pour the vanilla-infused milk over the sugar/yolk mixture. Mix well.
4. Wipe with a very wet cloth and then cover your baking mold (whatever shape is going to fit on the inside of your Yule log/cake) with parchment paper. Pour the cream into the mold and bake at 210°F (100°C) for about 1 hour or until firm on the edges and slightly wobbly in the center.

Element #6 Dark Chocolate Icing

4g / ½ Tbsp powdered gelatin or 2 sheets gelatin
¼ cup (60g) heavy cream (35 % fat content)
2.1 oz (5 Tbsp / 60g) granulated sugar
¼ cup (50g) water
1/3 cup (30g) unsweetened cocoa powder

1. Soften the gelatin in cold water for 15 minutes.
2. Boil the rest of the ingredients and cook an additional 3 minutes after boiling.
3. Add gelatin to the chocolate mixture. Mix well.
4. Let cool while checking the texture regularly. As soon as the mixture is smooth and coats a spoon well (it is starting to gelify), use immediately.

Assembling the Log

1) Mousse
2) Creme Brulee Insert
3) Mousse
4) Praline/Crisp Insert
5) Mousse
6) Ganache Insert
7) Dacquoise


Sunday 14 December 2008

"Happymusic" concert

Friday I went to a concert of I'm from Barcelona and I must state that it has been my best concert experience ever. I don't have huge record of concert experiences, but I have been seeing some big names in huge stadium concerts. I have figured out already for some long time ago, that huge concerts are not as enjoyable to the audience as concerts held in smaller venues. So there you go, that's why the concert on Friday gets extra 100 bonus points on the enjoyment scale.
Concert on Friday was in a small venue and for that it was perfect. In a small space it's this intimacy between the band and the audience. Plus those guys used balloons to create interaction, it was great. They had huge red balloons released, so balloons were bouncing between them and the crowd. Such a simple thing, but everyone seemed to want to be able to give a kick to it when it was approaching over the heads. Poor little people they had no chance :D Also because the band had been formed of 20 something friends, there is great party scenery on the stage, so it is impossible not to get caught with it. Great stuff!!!
They were mostly singing songs from their new album which I didn't know yet, but of course there were couple of songs from the old one for everyone to sing along. Let me tell you, you want them to your party, its a recession and maybe you cannot afford them but you can afford buying a CD. Oh and since we are close to Christmas, you can write to Santa to get you a CD ;)

Saturday 29 November 2008

Enough sugar for a lifetime


Another challenge finished. Wasn't easy, but I got it done. November challege was hosted by Dolores of Culinary Curiosity, Alex of Blondie and Brownie, Jenny of Foray into Food and gluten free assistant was Natalie of Gluten-a-Go-Go and their chosen recipe was Caramel Cake with Caramelized Butter Frosting by Shuna Fish Lydon of Eggbeater.

I must admit that caramel isn't my number one choice and probably without Daring Bakers I would have never tried something like this. Therefore I am happy for the proposal, now I know that this is not my cup of tea.


CARAMEL CAKE WITH CARAMELIZED BUTTER FROSTING

10 Tablespoons unsalted butter at room temperature

1 1/4 Cups granulated sugar

1/2 teaspoon kosher salt

1/3 Cup Caramel Syrup (see recipe below)

2 each eggs, at room temperature
splash vanilla extract
2 Cups all-purpose flour

1/2 teaspoon baking powder

1 cup milk, at room temperature


Preheat oven to 350F
Butter one tall (2 – 2.5 inch deep) 9-inch cake pan.
In the bowl of a stand mixer fitted with a paddle attachment, cream butter until smooth.
Add sugar and salt & cream until light and fluffy. Slowly pour room temperature caramel syrup into bowl. Scrape down bowl and increase speed. Add eggs/vanilla extract a little at a time, mixing well after each addition. Scrape down bowl again, beat mixture until light and uniform.
Sift flour and baking powder.
Turn mixer to lowest speed, and add one third of the dry ingredients. When incorporated, add half of the milk, a little at a time. Add another third of the dry ingredients, then the other half of the milk and finish with the dry ingredients. {This is called the dry, wet, dry, wet, dry method in cake making. It is often employed when there is a high proportion of liquid in the batter.}
Take off mixer and by hand, use a spatula to do a few last folds, making sure batter is uniform. Turn batter into prepared cake pan. Place cake pan on cookie sheet or 1/2 sheet pan. Set first timer for 30 minutes, rotate pan and set timer for another 15-20 minutes.
Your own oven will set the pace. Bake until sides pull away from the pan and skewer inserted in middle comes out clean. Cool cake completely before icing it.
Cake will keep for three days outside of the refrigerator.

CARAMEL SYRUP

2 cups sugar

1/2 cup water

1 cup water (for "stopping" the caramelization process)


In a small stainless steel saucepan, with tall sides, mix water and sugar until mixture feels like wet sand. Brush down any stray sugar crystals with wet pastry brush. Turn on heat to highest flame. Cook until smoking slightly: dark amber.
When colour is achieved, very carefully pour in one cup of water. Caramel will jump and sputter about! It is very dangerous, so have long sleeves on and be prepared to step back. Whisk over medium heat until it has reduced slightly and feels sticky between two fingers. {Obviously wait for it to cool on a spoon before touching it.} Note: For safety reasons, have ready a bowl of ice water to plunge your hands into if any caramel should land on your skin.

CARAMELIZED BUTTER FROSTING

12 tablespoons unsalted butter

1 pound confectioner’s sugar, sifted

4-6 tablespoons heavy cream

2 teaspoons vanilla extract

2-4 tablespoons caramel syrup

Kosher or sea salt to taste


Cook butter until brown. Pour through a fine meshed sieve into a heatproof bowl, set aside to cool.
Pour cooled brown butter into mixer bowl. In a stand mixer fitted with a paddle or whisk attachment, add confectioner's sugar a little at a time. When mixture looks too chunky to take any more, add a bit of cream and or caramel syrup. Repeat until mixture looks smooth and all confectioner's sugar has been incorporated. Add salt to taste.
Note: Caramelized butter frosting will keep in fridge for up to a month.
To smooth out from cold, microwave a bit, then mix with paddle attachment until smooth and light


Cake, frosting, cake with frosting.

Monday 24 November 2008

Winter gatherings and Portuval vs. Catalunya

Life in our new house has indeed brought brightness and parties to our life in this dark time of the year. We have only lived here for a month now, but hosted 3 dinner parties. I have picture records only two of them though.
On one dinner we had the chef Rui Martins from Portugal, who gracefully prepared a two course meal. As a stater we had auted mushrooms with tomatoes and herbs on a toast for starter and for main meal more traditional deep fried chicken wings and thighs with tomato rice, salad and Nando's Sauce Toppings (a non-typical-portuguese franchising).


Portugal

Another major event was the reception of chef Jordi from Catalunya (not Spain) to make paella. For starter we had some cured ham and salami type of thing from Catalunya or Spain (I am trying to be politically correct here, not to insult anyone, but forgive me if I do). For main meal chef Jordi made poor peoples paella with chicken and some vegs. This is what roughly seemed for me to be in the dish, true recepie is only known by the chef himself and not to be given out to anyone.


Catalunya

As I mentioned there was three dinners and so the third one of them I was cooking and made a simple Lasagne, which tasted yummy, but unfortunately I don't have any photographic record of it. I leave the images for the responsibility of your imagination.


Chef Rui Vs. Chef Jordi


Just not to pass in vain, I will mention the fact that booth of these gran latinos are marvellous cookers, truly passionate about their food and able to do horrendous things to protect their master pieces.
With these Iberic Peninsula cuisine icons I realised that a good meal comes from the dedication of the chef and the environment created around the ritual of dinning and not the use of gourmet ingredients and the fashion look of the dish.

Friday 31 October 2008

Tossing the dough

Daring Bakers October challenge was making a real pizza dough. Well, I must say it I wasn't too excited about it and in the end it reflected on the result.
I have been making a pizza quite frequently myself. I never toss it and throw it, but try to get it on the pan in some more modest way and in the end the result is yummy.
I followed the recipe of the dough and all. I didn't have anything exciting for the filling, busy, busy life, no time to shop. So I boiled a tomato sauce that I usually make for pizzas: crushed tomatoes, onion, garlic, olive oil, Provence herbs, salt. Pepperoni slices and cheddar mozzarella grated cheese mix.
Tossing was a disaster, didn't work for me, dough got stuck on my hands, so I just spread it on the pan stretching it towards the sides.


Cheese got a little burned :(


BASIC PIZZA DOUGH ~
Original recipe taken from “The Bread Baker’s Apprentice” by Peter Reinhart.

Makes 6 pizza crusts (about 9-12 inches/23-30 cm in diameter).

Ingredients:
4 1/2 Cups (20 1/4 ounces/607.5 g) Unbleached high-gluten (%14) bread flour or all purpose flour, chilled
1 3/4 Tsp Salt
1 Tsp Instant yeast
1/4 Cup (2 ounces/60g) Olive oil or vegetable oil (both optional, but it’s better with)
1 3/4 Cups (14 ounces/420g or 420ml) Water, ice cold (40° F/4.5° C)
1 Tb sugar
Semolina/durum flour or cornmeal for dusting

DAY ONE

Method:
1. Mix together the flour, salt and instant yeast in a big bowl (or in the bowl of your stand mixer).

2. Add the oil, sugar and cold water and mix well (with the help of a large wooden spoon or with the paddle attachment, on low speed) in order to form a sticky ball of dough. On a clean surface, knead for about 5-7 minutes, until the dough is smooth and the ingredients are homogeneously distributed. If it is too wet, add a little flour (not too much, though) and if it is too dry add 1 or 2 teaspoons extra water.

3. Flour a work surface or counter. Line a jelly pan with baking paper/parchment. Lightly oil the paper.

4. With the help of a metal or plastic dough scraper, cut the dough into 6 equal pieces (or larger if you want to make larger pizzas).

5. Sprinkle some flour over the dough. Make sure your hands are dry and then flour them. Gently round each piece into a ball.

6. Transfer the dough balls to the lined jelly pan and mist them generously with spray oil. Slip the pan into plastic bag or enclose in plastic food wrap.

7. Put the pan into the refrigerator and let the dough rest overnight or for up to thee days.

DAY TWO

8. On the day you plan to eat pizza, exactly 2 hours before you make it, remove the desired number of dough balls from the refrigerator. Dust the counter with flour and spray lightly with oil. Place the dough balls on a floured surface and sprinkle them with flour. Dust your hands with flour and delicately press the dough into disks about 1/2 inch/1.3 cm thick and 5 inches/12.7 cm in diameter. Sprinkle with flour and mist with oil. Loosely cover the dough rounds with plastic wrap and then allow to rest for 2 hours.

9. At least 45 minutes before making the pizza, place a baking stone on the lower third of the oven. Preheat the oven as hot as possible (500° F/260° C).

10. Generously sprinkle the back of a jelly pan with semolina/durum flour or cornmeal. Flour your hands (palms, backs and knuckles). Take 1 piece of dough by lifting it with a pastry scraper. Lay the dough across your fists in a very delicate way and carefully stretch it by bouncing it in a circular motion on your hands, and by giving it a little stretch with each bounce. Once the dough has expanded outward, move to a full toss.

11. When the dough has the shape you want (about 9-12 inches/23-30 cm in diameter - for a 6 ounces/180g piece of dough), place it on the back of the jelly pan, making sure there is enough semolina/durum flour or cornmeal to allow it to slide and not stick to the pan.

12. Lightly top it with sweet or savory toppings of your choice.

13. Slide the garnished pizza onto the stone in the oven or bake directly on the jelly pan. Close the door and bake for about 5-8 minutes.


Perhaps it was my not excited attitude towards October challenge that influenced my final result or my busy lifestyle, who knows. In the end I wasn't happy with the result, it came out too greasy. As I said I have been making pizzas before and it seemed to me that this dough took more oil than the recipes that I have been using previously. Or maybe the cheese that I was using was with higher fat content, I don't know.
Oh well, eventually it was eaten and hungry bellies were thankful for Daring Bakers pizza challenge.

Wednesday 29 October 2008

New house


We would like to inform you that we have moved. Our new address is:
4 ****** *****

****** *******

*******

******* 6


You surely understand that for safety reasons I cannot actually write my new address here, but if you need it to send Christmas cards, give me a shout and I email it to you.
We managed to get a bargain. We got a 2 bedroom house for the price of 1 bedroom flat. We have back garden for bbq and for my herb garden and summer tomatoes.
The guys with a van who helped us to move said that this is a posh area. I don't mind posh as long as its safe and quiet, but I do mind posh if shops and services are expensive. Last night we went to local Superquinn and paid fortune for chicken breast. Today I managed to locate Aldi and got twice as much goods for less money than I paid yesterday. Crazy!

We moved in yesterday. Didn't get the heat working then, I was all grumpy and slept with 2 blankets. Today I made phone calls to Landlord and landlords little helper. At the beginning it seemed that things got super, heat working and all, but now its still the same as yesterday, heat doesnt work, keeps switching off. Either I am dumb or thing is really faulty. And now the little helper doesnt answer the phone any more because its past 5pm. Another night with 2 blankets and I leave it for Joao to figure out tomorrow as he has a day off.

Monday 29 September 2008

Back to school

I have started on a new full time job which means that in the evenings I am extremely tired and on my days off I just want to rest, rest, rest.
This coming weekend I will start a physiotherapy course which means that my free time will be even more limited. I promise that I don't leave my dear blog, I try to get to it at least once a month. There comes Daring Bakers to help me, because I have to keep up with those guys, which means I will be here publishing it. I must admit that I am taking a braking from Daring Bakers in September and it's only my second month with them :D Bad, bad girl.
I am not the only one going to school. Joao already started his Masters last week. So we will be one knowledge greedy family. All for the sake of hopefully being able to have comfortable life one day.

Why is this rabbit with a hula-hoop hanging in the toilet? Probably because he didn't invest in his youth ...

Tuesday 23 September 2008

Portugal - Food, Fun and Ferias

I haven't died or ditched my dear blog. We were on a holiday to Joao's house in Portugal to catch little bit of sun and enjoy all the goodies that this country has to offer.
It was 2 weeks of pure holiday fun with beach, friends and family, wedding, good food in enormous quantities etc.
We flew to Faro this time. Ticket was more affordable and also we wanted to make sure we get our obligatory dose of beach. In Algarve the chances of getting it are higher. Over all we had a great time there, although the whole place is not quite Portugal. Its very tourist orientated, all the music and even restaurants for them, with pasta and pizza, fish and chips. Albufeira still has nice scenery, lower buildings and small town like environment. Highly recommended!


Algarve with its beach. Yummy piri-piri shrimps. Beach with obligatory beach food, Bolas de Berlim pastry.

Next stop was wedding of Miz and Justin. Can you belive that it was my frist time to be in a wedding? Well, there was one time before. My aunts wedding, but I hear that I was 2 years old then, so I have no actual memory of it.
They got married in the Monastery of Alcobaca and this holy ritual was fallowed by a huge and yummy dinner. If I say huge, then I mean HUGE. Of course Portuguese might argue with me here and say that this is nothing because in the old days it was even better and more fooooooooood. Fooooood for 2 days!!! Hehehe. They certainly appreciate eating well and I must admit that me too :P Miz and Justin were beautiful and we had a good time. Oh and by the way the wedding cake was very good :)


The wedding dinner was held in a very nice wine farm. In the centre is the girl who catched the bouquet - wedding bells are ringing, wedding bells are ringing ... hehe :)


Friends forever - after plenty of wine.


Friends of the bride, the fashion ones :P

This time I actually remembered to photograph the food, sometimes. This is of course only a fraction of meals that I had in there. And I only notice now that I dont have a photo of Pastel de nata! Pastel de Nata!!! How can it be??? It only means one thing, I need to go back!

Portuguese goodies

As I mentioned earlier we went for Albufeira for the beach and sea, but it turned out that the sea was actually more pleasant in Nazare and surroundings. The sea was wild as usually and it's needed to be very cautious specially if you're like me and you can't swim. I enjoy going to the sea a lot though. Going to beach and not being able to go to the sea, it feels like being entire day in pyjamas, just doesn't feel right.

Vale Furado beach with a Spiderman

Staying at Joao's house it's impossible to be kept away from the natives, so in our busy agenda we could push some quality time with his family, friends and nosy neighbours.


Kids are so cute, if they are not yours

In the end we can say that we had a very good time in Portugal.

lõpp ... fim ...

Sunday 31 August 2008

I became a Daring Baker - Éclairs


Daring Bakers?
Daring Bakers.

It's a challenge made up by ancient foodbloggers to give us, the cooking/baking connoisseurs some challenge in everyday cooking and baking. Basically you sign up with those guys and then they will give you one recipe to bake in a month. Everyone, all those 1000 members or so, will bake exact same recipe and then publish it on exact same day. Me and all those other 1000 foodbloggers think its fun :)

Let's get to the challenge then. August challenge was
Chocolate Éclairs by Pierre Hermé hosted by Tony Tahhan and MeetaK. Hosts allowed to make some modifications and the rule was to keep at least one chocolate element in it. I went with more traditional version, I 'll explain later, why. I kept the pastry cream just with eggs and milk, left out the chocolate and my chocolate element was chocolate glaze.
When I have been baking, I've always kept it relatively simple, no fancy cakes, so reading this recipe at the beginning made me feel like, wow, I think I need to take a day off to do this and the day before, to make sure I have everything and a day after to make sure I can clean everything and can get a rest.


Let's get to the business.
Part 1. Making the dough. It's very easy. Just the non traditionality of making of the dough is what scares at first. Boil the milk! Sounds like making a porridge. But once its done, its done very fast and in the end its a beautiful creamy dough, just a shame it wasn't sweet :P
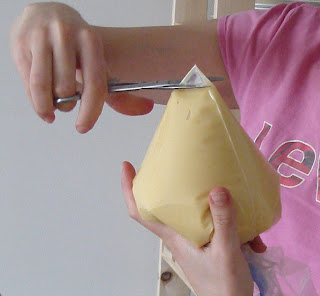
I didn't have a proper pastry dough, so I used the old fashioned plastic bag technique.


Scoop the dough into one corner of the bag and then cut the corner off.

I learned the trick from my mother actually, this is how we decorated gingerbread cookies with sugar glaze at every Christmas. It works perfectly fine, if you don't need to do fancy reliefs. One day I will get a real pastry bag though, maybe I should put it in my list for Santa :P


Squeeze chubby fingers on the baking sheets

Part 2. Making pastry cream. I thought, eggs and hot milk, it's a miracle if it comes out fine on a first trial, it will all end up with lumps ... Well, I must admit that I had extra set of hands helping me on this recipe. So one set was mixing vigorously while the other added the hot milk one teaspoon at a time. Like this, it all worked out great. This is a most beautiful Pastry cream I have ever made, nice, shiny, creamy ... lovely.


Out of the oven, cream ready, just missing the glaze now ...

Part 3. Making the glaze. That's was the easiest part. Heat the cream, chop the chocolate etc. Part 4. Putting it all together. Is there enough cream? Pastry seems so fragile, can I cut the pastry without wrecking half of them? Well, if I do then there is definitely enough cream ... This is a real handicraft part. Cutting wasn't too bad, if using proper bread knife and sawing them gently then it all works out great. Putting a glaze on the tops requires patience, first 5 is fun, then getting to 10, then you think , "are we there yet?" The filling was just about enough, could've been few Tbsp more, but I suppose it was the missing chocolate that I left out of the cream.


This is my little Éclair factory

Here comes conclusion with everything explained. Why I left chocolate out of the Pastry cream? Because Joao is the main consumer of these Éclairs and he is a traditional guy when it comes to food. Anything new is SCARY. Chocolate in the pastry cream is something that he never had in past 20 years so unless I don't want to eat 24 Éclairs alone, I better take his suggestions into account. he liked them, so next time, it might be with Chocolate pastry cream :P Yes, well, on my first month as Daring Baker I have committed myself with some diet, which means no sweets other than fruit and that's the main reason why Joao has to like them. I had to sin of course, to try out just one Éclair, to be able to write the following. It all came out wonderful. Pastry was very delicate. Cream was, like I said, lovely, creamy. Next time if I want to leave the chocolate out, I will put a bit more sugar in the pastry cream , because otherwise it's needed to eat 5 Éclairs to get satisfied. My waist would hate me for this. In the end when they are crafted all together, they taste, wow. The best I have had, also because they were super fresh. In the Pastry shop, you never know how long has it been sitting there on the display.


Cream Puff Dough (makes 20-24 Éclairs)
½ cup (125g) whole milk

½ cup (125g) water

1 stick (4 ounces; 115g) unsalted butter, cut into 8 pieces

¼ teaspoon sugar

¼ teaspoon salt
1 cup (140g) all-purpose flour

5 large eggs, at room temperature


Pastry Cream

2 cups (500g) whole milk

4 large egg yolks

6 tbsp (75g) sugar
3 tablespoons cornstarch, sifted

7 oz (200g) bittersweet chocolate, preferably Velrhona Guanaja, melted

2½ tbsp (1¼ oz: 40g) unsalted butter, at room temperature


Chocolate Glaze
(makes 1 cup or 300g)
1/3 cup (80g) heavy cream

3½ oz (100g) bittersweet chocolate, finely chopped

4 tsp (20 g) unsalted butter, cut into 4 pieces, at room temperature

7 tbsp (110 g) Chocolate Sauce (recipe below), warm or at room temperature

Chocolate Sauce
(makes 1½ cups or 525 g)
4½ oz (130 g) bittersweet chocolate, finely chopped

1 cup (250 g) water

½ cup (125 g) crème fraîche, or heavy cream

1/3 cup (70 g) sugar

Cream Puff Dough:
* Preheat your oven to 375 degrees F (190 degrees C). Divide the oven into thirds by positioning the racks in the upper and lower half of the oven. Line two baking sheets with waxed or parchment paper. * In a heavy bottomed medium saucepan, bring the milk, water, butter, sugar and salt to the boil.
* Once the mixture is at a rolling boil, add all of the flour at once, reduce the heat to medium and start to stir the mixture vigorously with a wooden spoon. The dough comes together very quickly. Do not worry if a slight crust forms at the bottom of the pan, it’s supposed to. You need to carry on stirring for a further 2-3 minutes to dry the dough. After this time the dough will be very soft and smooth.
* Transfer the dough into a bowl of a mixer fitted with the paddle attachment, or using your
hand mixer or if you still have the energy, continue by hand. Add the eggs one at a time, beating after each egg has been added to incorporate it into the dough. You will notice that after you have added the first egg, the dough will separate, once again do not worry. As you keep working the dough, it will come back all together again by the time you have added the third egg. In the end the dough should be thick and shiny and when lifted it should fall back into the bowl in a ribbon.
*
Fill a large pastry bag fitted with a 2/3 (2cm) plain tip nozzle with the warm cream puff dough. Pipe the dough onto the baking sheets in long, 4 to 41/2 inches (about 11 cm) chubby fingers. Leave about 2 inches (5 cm) space in between each dough strip to allow them room to puff. The dough should give you enough to pipe 20-24 éclairs.
* Slide both the baking sheets into the oven and bake for 7 minutes. After the 7 minutes, slip the
handle of a wooden spoon into the door to keep in ajar. When the éclairs have been in the oven for a total of 12 minutes, rotate the sheets top to bottom and front to back. Continue baking for a further 8 minutes or until the éclairs are puffed, golden and firm. The total baking time should be approximately 20 minutes.
Notes:
The éclairs can be kept in a cool, dry place for several hours before filling.

Pastry Cream:

* In a small saucepan, bring the milk to a boil. In the meantime, combine the yolks, sugar and cornstarch together and whisk in a heavy‐bottomed saucepan.
* Once the milk has reached a boil, temper the yolks by whisking a couple spoonfuls of the hot milk into the yolk mixture.Continue whisking and slowly pour the rest of the milk into the tempered yolk mixture.

* Strain the mixture back into the saucepan to remove any egg that may have scrambled. Place the pan over medium heat and whisk vigorously (without stop) until the mixture returns to a boil. Keep whisking vigorously for 1 to 2 more minutes (still over medium heat).Stir in the melted chocolate and then remove the pan from the heat.

* Scrape the pastry cream into a small bowl and set it in an ice‐water bath to stop the cooking process. Make sure to continue stirring the mixture at this point so that it remains smooth.

* Once the cream has reached a temperature of 140 F/60 C remove from the ice‐water bath and stir in the butter in three or four instalments. Return the cream to the ice‐water bath to continue cooling, stirring occasionally, until it has completely cooled. The cream is now ready to use or store in the fridge.

Chocolate Glaze:

* In a small saucepan, bring the heavy cream to a boil. Remove from the heat and slowly begin to add the chocolate, stirring with a wooden spoon or spatula.

* Stirring gently, stir in the butter, piece by piece followed by the chocolate sauce.

Chocolate Sauce:

* Place all the ingredients into a heavy‐bottomed saucepan and bring to a boil, making sure to stir constantly. Then reduce the heat to low and continue stirring with a wooden spoon until the sauce thickens.

* It may take 10‐15 minutes for the sauce to thicken, but you will know when it is done when it coats the back of your spoon.
Note:
You can make this sauce ahead of time and store it in the refrigerator for two weeks. Reheat the sauce in a microwave oven or a double boiler before using. This sauce is also great for cakes, ice-cream and tarts.


Assembling the éclairs:
1) Slice the éclairs horizontally, using a serrated knife and a gently sawing motion. Set aside the bottoms and place the tops on a rack over a piece of parchment paper.
2) The glaze should be barely warm to the touch (between 95 – 104 degrees F or 35 – 40
degrees C, as measured on an instant read thermometer). Spread the glaze over the tops of the éclairs using a metal icing spatula. Allow the tops to set and in the meantime fill the bottoms with the pastry cream.
3) Pipe or spoon the pastry cream into the bottoms of the éclairs. Make sure you fill the bottoms
with enough cream to mound above the pastry. Place the glazed tops onto the pastry cream and wriggle gently to settle them.


Saturday 23 August 2008

Let's run a marathon

Think! This could be you.

Its in my nature to want challenges. Otherwise its boring. Now I came up with this silly idea about running a marathon.
It was one Saturday morning when I went to work and remembered that on that same day my colleague was about to run Helsinki marathon. And there I was dreaming until I got hooked up in this feeling that it must feel awesome when you run or walk or crawl over the finish line of marathon. And it takes about 3 hours of my time, so its not that bad, I can find that time :P
This whole idea about running a marathon is scary, but at the same time, it keeps on haunting me, so I am starting to think that I think I have to do it, to get rid of the ghost.

I was googeling little a bit about training for marathon and stuff. One source said that you should be running regularly every week at least a year before starting training for marathon. And lately my running routine has seriously faded. I will get back to running as soon as I get my life back into routine, I promise. At the moment there is holidays coming up and starting a new job, looking for a new house etc.

And I am not talking here running in 6 months. I am talking about setting a realistic goal to run in 2010, this gives enough time, to shake off that laziness, right.
I did e-mail to few people, 3 to be preicise. Two of them, men, said no right away. One of them, a woman, gave me a litte hope, that I might not be alone in this crazy thought. I'm not trying to say anything here ... hehe :)

Thursday 21 August 2008

Huge dose of Estonian on 19th of August in Tallinn

Unfortunately I couldn't be there ... I bet every Estonian says that, but the truth is that the little piece of Earth where its kept, is also limited, so not all 1,3 million will fit in there.

The singing, I suppose we get it with breast milk, you usually say, but no, for us it comes with basic 9-year education in school. Where practically all the kids who can sing, without sounding like untuned instrument, attend the school choir and from there on national song festival in every 2 years. I remember that at one point my "teenager monster" raised the head and I refused to go to choir . Then music teacher said that it is strictly obligatory and of course then I felt even more revolutionary and definitely not wanting to go. I cannot remember exactly, but I bet all this lasted few weeks and then I was back, attending the weekly rehearsals, because the truth is, that everyone wanted to go to song festivals. It was going away for a week, sleeping entire choir together in some classroom floor in sleeping bags. Huge sleepover for entire week. After big rehearsals going around in the capital, sometimes seeing famous people on the streets WOW ... all this, was a great reward for a girl from a little countryside school. In the end it felt very impressive to sing in this huge choir of 15 000 people . Anyway, this is how we learned to appreciate singing together, from school, with basic education and the outcome was that Estonians sang themselves free from Soviet Union 20 years ago.

More precisely 20 years ago on 11th of September 1988, 300 000 Estonians (according to wikipedia) gathered on the same spot in Tallinn Song Festival Grounds, to sing songs about the country and freedom, together with politicians and singers, who were spreading the message. Not throwing rocks and burning flags, just singing :)

Now they have repeated this event, for some it was nostalgic (that's me, I was young then, but I remember it all), for young folks, its was completely new and fresh injection of nationalism.
The outcome was simply beautiful. I wish I was there...
That's my nationalism raising head :)

This song was composed by Tõnis Mägi, also sang by him on this video, and became The song of restoration of independence of Estonia in 1991.

Thursday 14 August 2008

Meet Robert and other stories ...

Robert is our newcomer pet snail. We didn't buy Robert from a pet store or didn't pick him up from a bush in the park. Miraculously Robert came to us by itself. On Tuesday evening when we sat at the table to have dinner, Joao noticed a snail on the leg of the table (I don't know if you say "leg", but you know what I mean). A snail in the house, in 3rd floor apartment? How? Its a mystery till today? We gave him a little lettuce to nibble and called him Robert. He lives a happy life in my herb garden in the balcony, just few minutes ago when I checked he was conquering the rosemary bush.


Pet snail Robert and a proud owner

Over the weekend we got some serious rain here. You might think that here they are used to it, but this one seemed to be over the limit. Roads were flooded and people locked into the house and out of the house. We even got two refugees in our house to wait the traffic jams to calm down. Because some of the roads were flooded, then the accessible ones got serious traffic. Supposebly it was a madness, something that people can talk about next 10 years. Where I was, on my 3rd floor apartment, I didnt notice much difference. Yes, meanwhile it seemed to rain so much that I didnt see the other apartment buildings next to mine, but that was about it. Oh yes and few days later, when taking a walk to the park, we found it closed on one side, because there was an ocean.


Northwood ocean

Saturday 9 August 2008

Brilliant inventions - Banana "ice-cream"

I found this recipe surfing in the internet. I cannot remember at all where, so my apology to the inventor, I am not trying to take the credits here, just spread the word about this goodness. Its good alternative if you need to put a brake on all this baking and baking and baking. Its lovely dessert, without a drop of sugar added. To be honest I don't even remember the amounts, so here I give you my instructions. Perhaps you can make it even more perfect for yourself.

Banana "ice-cream"

1. I cut about 1 1/2 bananas and put it to freezer and froze it overnight. (1/2 banana just didn't make it to the freezer, I had to try if it was still good :P)
2. Take out frozen banana pieces and put it to a blender with some nuts. I used 3-4 hazelnuts and 3-4 cashews, but you can use whichever you prefer. This amount seemed plenty for 1 1/2 bananas.
3. Just blend until well blended.
4. Serve immediately.


Banana "ice-cream" - Eat yourself and offer to a friend.


Thursday 7 August 2008

Baking on the rain

So I guess it's my turn now.

Yes, I'm the infamous one who has the name up but never dared to write a few words in this cute little board. For the ones who haven't figured out yet, I'm João, the other half of this blog, who actually is much less than half.


I hope I can maintain the standards of this place, and for that I'll promise to behave.


OK, but now let's Post!


One of these days it was raining in Dublin. I was not only surprised but also shocked. How come?! So unpredictable?! I just couldn't believe that it was raining on the day that I had plans to do nothing.


Oh well! - I thought. I guess it will be alright because there will be plenty more opportunities to do nothing.


Inspired by such a typical horrible weather I decided to do something extraordinary.


I don't want to stop any weak heart, but in fact I BAKED! In deed! Seriously!


I opted for this very basic Portuguese cake, original from my County, which is made for sweet teeth like me. It's called Pão de Ló de Alfeizerão.


It's based on Eggs and Sugar, and a small drop of flour. This mix makes it moist and very sweet, becoming a true orgy in my mouth.


I leave here a picture and the recipe. Enjoy it with tea or coffee on a rainy day.


Pão de Ló de Alfeizerão

2 Eggs
6 Eggs Yolks
100 gr of Sugar
50 gr of flour

Blend the eggs with the sugar until it's foamy. Continue blending and add one by one the egg yolks. Blend this mix for 10 minutes. Gently fold in the flour and take to a hot oven (225ºC) for 10 minutes.


PS: The cake will massively fall down after taken out of the oven, but don't panic, it's how it's meant.

Tuesday 5 August 2008

Celebrating tiny baby tomato with roast chicken and Portuguese rosé


Dingle peninsula

I have my mother visiting me for 5 days, so we had a strong reason to leave Dublin and to go to see Ireland for the very first time in 8 months. Yes, 8 months in Ireland and the furthest that we had been until Saturday was Malahide. But not any more, now we have been alllllllll the way to the other side of the country, to Co. Kerry at the West Coast. We drove to Limerick and from there we made our way to Tralee, though smaller roads and beautiful countryside. In Tralee we spent a night in traditional B&B above the Pub. It was very convenient I must say, listening live music and having pints and then just few steps and you are in cosy bed. Well, lets be honest here now :P There was lots of noise too, but that was only first 10 min until I fell asleep :)


Me mother

This morning I noticed that my tomato plant is fully fertile and giving birth to tiny green baby tomatoes. Wiii ... it was blossoming for few weeks now, but didn't give any sign of tomatoes, so I was getting afraid that its a one lazy tomato plant. So you can imagine my joy this morning when I discovered the first tomato on it :D


Tomato nr.1

On Monday night I had 5 mouths to feed and I spotted a whole chicken in the supermarket, so thought, why not? Let's cook the whole darn chicken. I didn't follow any recipe. Just seasoned with salt and pepper, put some rosmary. When chicken had been in the oven for an hour I put the potatoes in the oven dish underneath the chicken and then gave it another 30 min or so.
The outcome was simple, very chickenny. Unfortunately there is no photo, because I forgot to take it and taking a photo of a dismantled chicken in the Tupperware box won't have the same impact. Next time then. And yes, there was lovely Portuguese rosé to accompany all this, given us by friends who went to Portugal this spring. So now was a good reason enough to open it. But as I said no photos this time, use your imagination, I don't want you to get your imagination spoiled :P